
How to Grow Tomatoes in Your Backyard
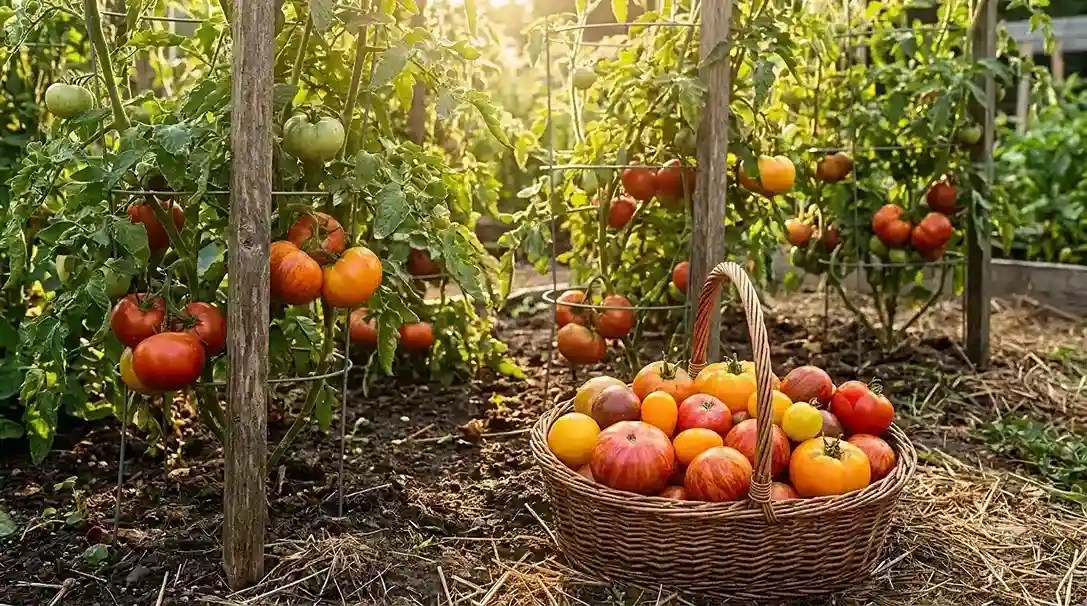
There is something satisfying about walking into your backyard and picking a ripe tomato straight from the plant.
Tomatoes are productive enough to make even a small garden feel rewarding, but a good harvest depends on a few decisions made before the first fruit appears. The variety you choose affects how much space and support the plant needs. Your soil, sunlight, watering habits, and local weather all influence growth. Once the plants are established, regular observation becomes more important than following a rigid calendar.
This guide brings the important pieces together in one place.
You will learn how to choose tomato varieties, decide between determinate and indeterminate plants, prepare the soil, start tomatoes from seed or buy healthy transplants, harden plants before moving them outdoors, plant correctly, provide support, water and mulch, manage pruning and fertilizer, identify common pests and diseases, recognize problems such as blossom-end rot and fruit cracking, harvest tomatoes at the right stage, and preserve a large harvest safely.
The aim is not to give you one recipe that supposedly works in every garden.
It is to help you understand what the plant needs so you can adjust your care to your own climate, soil, variety, and growing conditions.
For additional gardening tools that can help with watering, planting schedules, and general plant care, visit the Free AI Gardening Tools hub.
Table of Contents
Why Grow Tomatoes at Home?
Tomatoes are one of the most useful vegetables for a home garden because the same crop can be used in fresh meals, cooked dishes, sauces, salads, sandwiches, and preserved foods.
You also have much more control over what varieties you grow.
A supermarket may offer only a handful of tomato types at a particular time of year, while a home gardener can choose cherry tomatoes, paste tomatoes, slicing tomatoes, heirlooms, hybrids, compact container varieties, and varieties selected for particular growing conditions.
There is also the simple pleasure of harvesting exactly what you need.
Instead of picking everything at once, you can harvest a few ripe tomatoes for dinner and leave the remaining fruit to continue developing.
The most important advantage, however, is flexibility.
A tomato garden can be adapted to a backyard bed, raised bed, grow bag, patio, or balcony.
You do not need a huge plot of land to begin.
Start with the amount of space you can realistically maintain.
For a broader example of how a small growing area can be designed around practical home gardening, see the Raspberry Bush Growing Guide.
Choosing the Right Tomato Variety

Determinate and indeterminate tomatoes should be treated differently when planning your garden.
Determinate Tomatoes
Determinate tomatoes have a more compact growth habit and eventually stop extending their main stems.
They generally produce a substantial portion of their crop over a relatively concentrated period.
This can make them useful for:
small gardens
containers
gardeners who want a more compact plant
and gardeners who prefer a more concentrated harvest for cooking or preserving
Do not assume that every determinate variety will reach exactly the same height. Mature size depends on the cultivar.
Indeterminate Tomatoes
Indeterminate tomatoes continue producing new growth while growing conditions remain suitable.
They can become large plants and generally need stronger, taller support.
Their continued growth can also provide a longer harvest period.
University extension guidance distinguishes determinate tomatoes by their more limited growth habit and indeterminate tomatoes by their continued vine growth and greater support needs.
Choose Tomatoes by How You Eat Them
Cherry tomatoes
Excellent for salads, snacks, lunch boxes, and quick meals.
Paste tomatoes
Roma and other plum-shaped tomatoes are commonly useful for sauces, soups, and cooking.
Slicing tomatoes
Large-fruited varieties are particularly useful for sandwiches and fresh eating.
Heirloom tomatoes
Heirlooms are popular for distinctive shapes, colors, flavor profiles, and historical interest.
Hybrid tomatoes
Hybrids are deliberately crossed varieties that may be selected for traits such as disease resistance, uniformity, productivity, maturity, or fruit quality.
A hybrid is not automatically inferior in flavor, and an heirloom is not automatically easier to grow.
Look at Disease-Resistance Codes
Seed packets and plant labels may contain resistance abbreviations.
Common examples include:
V – verticillium wilt
F – Fusarium wilt
N – root-knot nematodes
T or TMV- tobacco mosaic virus, depending on catalog terminology
Resistance does not mean immunity.
It means the variety has been bred or selected to have resistance to a particular problem.
For another example of choosing a plant around growing conditions rather than simply choosing the most attractive variety, see the Papaya Plants for a Continuous, Tasty Crop guide.
Essential Tools and Materials
You do not need a large collection of expensive equipment to grow tomatoes.
A practical setup includes:
a garden trowel
hand pruners
gardening gloves
a watering can, hose, or watering wand
plant labels
soft plant ties
a suitable tomato cage, stake, or trellis
and appropriate compost or fertilizer when needed
The support system deserves particular attention.
A small seedling may eventually become a large plant carrying many heavy fruits.
Installing support early is much easier than trying to fit a large, tangled plant into a support system later.
Penn State Extension recommends installing supports around planting time rather than waiting until plants are large enough that installing a support could disturb their roots.
For gardeners who want to organize plant care around sunlight, watering, soil, feeding, and seasonal maintenance, the Free AI Plant Care Guide Generator can be used as a general planning aid.
Preparing the Soil and Planting Site

Tomatoes need a growing area where roots have access to moisture, air, nutrients, and enough space to develop.
Prepare the Soil
Start by examining the soil you already have.
If it is compacted, loosen it.
If drainage is poor, improve the drainage rather than trying to solve the problem with additional fertilizer.
If organic matter is low, mature compost can help improve soil structure.
A soil test is useful when you need to know whether nutrient levels or pH need correction.
Tomatoes generally perform well in slightly acidic soil, and a pH around 6.0–6.8 is commonly used as a practical target. Use a soil test to determine whether your soil actually requires an adjustment rather than automatically adding lime or sulfur.
Penn State Extension recommends using soil testing to guide fertility decisions rather than applying nutrients blindly.
Choose a Sunny Location
Tomatoes are warm-season, sun-loving plants.
Aim for at least six hours of direct sunlight each day, with more sunlight often beneficial when conditions permit.
Look at the garden throughout the day.
A location that looks sunny at 9 a.m. may become shaded by a wall, tree, building, or neighboring plant by early afternoon.
Check Drainage
Good drainage matters as much as sunlight.
Water should move through the soil rather than remaining pooled around the roots for long periods.
If water regularly collects after rainfall, consider a raised bed or another planting location with better drainage.
Raised Beds or In-Ground Beds?
Both can work.
Raised beds may be useful when:
Your native soil drains poorly.
The ground is difficult to work on.
You want greater control over the growing medium.
Or you prefer a higher planting surface
In-ground planting can work perfectly well when the existing soil is suitable.
There is no universal rule that raised beds are always better.
The goal is simply to create a healthy root environment.
For another example of practical container and growing-medium planning, see How to Grow Pineapple in Pots.
Starting Tomato Plants From Seed

Tomatoes are relatively easy to start from seed if you provide suitable warmth, moisture, and light.
Starting from seed gives you access to many more varieties than you may find as nursery transplants.
For many gardeners, starting seeds approximately 6–8 weeks before the intended outdoor planting date is a useful starting point, although the exact timing should follow your climate and seed packet instructions.
Use a lightweight seed-starting mix instead of heavy garden soil.
Sow seeds at the depth recommended on the packet. Around ¼ inch is commonly suitable for many tomato seeds.
Keep the medium evenly moist rather than saturated.
Tomatoes germinate well under warm conditions, and around 70–80°F (21–27°C) is a practical range for many varieties.
Once seedlings emerge, provide strong light.
A sunny window can help, but indoor seedlings can become thin and stretched if the light is insufficient.
A suitable grow light positioned close enough to provide strong light can produce sturdier seedlings.
Do not place seedlings directly against a heater, radiator, or other hot surface.
Warmth is useful.
Excessive heat is not.
When seedlings become crowded or outgrow their original cells, move them to larger containers if necessary.
The goal is not to make them enormous before transplanting.
The goal is to produce healthy, compact plants with sturdy stems and established roots.
For location-specific planting timing, check the AI Plant Growing Calendar by Location and compare its suggestions with your actual local weather.
Buying Healthy Tomato Transplants
Buying transplants is often the fastest way to start a tomato garden.
Do not automatically choose the tallest plant.
Look for:
a sturdy stem
healthy green foliage
a well-developed but not severely root-bound root system
no obvious insect infestation
no severe leaf spotting
no widespread wilting
and a label showing the variety and growth habit
Inspect the underside of leaves as well as the top surface.
Check the stem for discoloration or damage.
If several plants of the same variety are available, choose the ones that look compact and healthy rather than those that simply look the largest.
Also check whether the variety is determinate or indeterminate.
That information will affect both spacing and support.
For general help interpreting visible plant-health problems, see the Free AI Plant Disease Identifier.
Hardening Off Tomato Seedlings

Seedlings raised indoors need time to adjust to outdoor sunlight, wind, temperature changes, and other conditions.
This gradual transition is called hardening off.
Start by placing the seedlings outdoors in a sheltered location for a relatively short period.
Initially protect them from strong midday sun and strong wind.
Over the following days, gradually increase the amount of time they spend outside and increase their exposure to direct sunlight.
A rigid seven-day schedule is unnecessary.
Weather should determine how quickly you proceed.
Illinois Extension recommends gradually increasing outdoor exposure over about one to two weeks and waiting until the danger of frost has passed before putting warm-season crops such as tomatoes outdoors.
Watch the plants as they adapt.
Severe wilting, leaf scorch, or other sudden stress means the exposure may have increased too quickly.
Slow down and give the plants more sheltered conditions.
Also pay attention to nighttime temperatures.
Tomatoes are sensitive to cold, particularly while they are still young.
Your location-specific calendar can help with timing, but actual weather conditions should have the final say.
When and How to Plant Tomatoes Outdoors

The best planting date is not determined by a universal calendar.
It depends on:
your local climate
frost risk
soil temperature
nighttime temperatures
variety
and the length of your growing season
Wait until conditions are consistently warm enough for tomatoes to establish.
Penn State Extension emphasizes waiting until the weather and soil are warm enough for successful tomato growth rather than planting according to a fixed date.
Planting Depth
Tomatoes can produce additional roots along buried portions of the stem.
That makes it possible to plant a leggy transplant more deeply than many other vegetables.
Remove lower leaves that would otherwise be buried.
Plant the root ball and an appropriate section of stem below the soil surface.
For an unusually tall or leggy plant, you can also lay part of the stem horizontally in a shallow trench while leaving the top growth above the soil.
Do not bury leaves.
Water Immediately After Planting
Give the newly planted tomato a thorough watering so the soil settles around the roots.
Do not compress the soil excessively.
The goal is good root-to-soil contact while keeping the root zone well aerated.
Give Plants Enough Room
Spacing depends on variety and support method.
A practical home-garden starting point is often around 18–36 inches between plants, with more room generally useful for vigorous indeterminate varieties.
Your seed packet or transplant label should take priority when it gives a cultivar-specific recommendation.
Good spacing also makes harvesting, watering, pruning, and disease inspection easier.
For another example of planting a warm-climate crop around local conditions, see How to Grow Mango Trees for Juicy Summer Harvests.
Watering and Mulching Tomato Plants

Tomatoes need consistent access to moisture, but there is no universal schedule that works for every garden.
A small container in hot sun may require much more frequent attention than a deeply rooted plant growing in the ground.
Penn State Extension gives about 1–1½ inches of water per week as a general home-garden guideline while also recommending that gardeners adjust watering according to soil and weather conditions.
University of Minnesota Extension likewise emphasizes consistent moisture and thorough watering rather than frequent light sprinkling.
Check Before Watering
Check the soil rather than following the calendar.
Push your finger into the growing medium near the root zone.
If the soil is still moist below the surface, more water may not be necessary yet.
If it has become noticeably dry, water thoroughly.
Water the Root Zone
Apply water around the base of the plant.
Avoid routinely soaking the leaves.
Wet foliage can increase disease risk under favorable conditions.
Drip irrigation, soaker hoses, and careful hand watering can all work.
Avoid Both Extremes
Constantly saturated soil can deprive roots of oxygen.
Severe drying followed by heavy irrigation can cause rapid changes in fruit water availability and increase problems such as cracking and blossom-end rot.
Use Mulch
A layer of suitable mulch can reduce evaporation, limit weed growth, and reduce soil splashing onto lower leaves.
Around 2–3 inches is a useful starting point for many garden situations.
Keep the mulch a little away from the stem.
Straw, shredded leaves, and other suitable organic materials can work well.
For personalized watering estimates based on plant and growing conditions, use the Free AI Plant Water Calculator.
Supporting Tomato Plants as They Grow

Choose the support system according to the variety.
Stakes
Stakes work particularly well for gardeners who want to train a tomato vertically.
Use soft ties and attach the stem loosely as it grows.
Do not tie the stem tightly.
The plant will continue to thicken during the season.
Cages
Cages allow the plant to grow within a supporting structure.
Choose a cage large and strong enough for the mature plant.
Small decorative cages may be inadequate for vigorous indeterminate tomatoes.
Trellises
Trellises can be useful where vertical space is available.
They can also make harvesting easier because fruit is easier to see and access.
For a row of plants, systems such as a Florida weave can provide shared support.
Install Support Early
Put the support in place at planting time whenever possible.
Trying to force a large tomato plant into a support later can damage roots or break stems.
Penn State Extension recommends supporting tomatoes early rather than waiting until the plants are large.
For another example of practical support and trellis management, see the Raspberry Bush Growing Guide.
Pruning Tomato Plants and Managing Suckers

Tomato plants naturally produce side shoots where a leaf branch meets the main stem.
These are commonly called suckers.
Whether you remove them depends on the variety and growing system.
Determinate tomatoes generally need little routine pruning.
Indeterminate tomatoes can be selectively pruned when trained on stakes or certain trellises.
The goal should be organization and airflow, not stripping the plant of leaves.
Removing Selected Suckers
Small shoots are easiest to remove when they are young.
Use clean hands for tender shoots and clean pruners for larger growth.
Avoid tearing stems.
Remove Lower Leaves When Appropriate
Leaves touching wet soil can be removed.
Severely diseased leaves may also need removal.
Do not remove large amounts of healthy foliage simply because the plant looks crowded.
Healthy leaves contribute energy to plant growth and fruit development.
Excessive pruning can also expose fruit to strong sunlight and increase sunscald risk.
University of Minnesota Extension notes that tomato problems such as sunscald and other fruit disorders can be influenced by plant growth and environmental conditions.
Use pruning to improve management rather than as a goal in itself.
For a general personalized care plan covering pruning and plant maintenance, see the Free AI Plant Care Guide Generator.
Fertilizing Tomato Plants
Tomatoes need nutrients, but a larger amount of fertilizer is not automatically better.
Start with the soil.
A soil test can help reveal nutrient levels and pH, which is much more useful than applying the same fertilizer schedule to every garden.
Compost
Mature compost can improve soil structure and add organic matter.
Use it according to the needs of your soil rather than assuming more is always better.
Fertilizer During the Growing Season
Use a fertilizer appropriate for tomatoes and follow the product label.
Container-grown tomatoes may need more frequent feeding because nutrients can move through a relatively small volume of growing medium during repeated watering.
But that does not mean every tomato requires liquid fertilizer every two or three weeks.
Watch for Excess Nitrogen
Excess nitrogen can encourage vigorous leaf growth while producing fewer fruits.
A plant with extremely lush foliage is not necessarily perfectly fertilized.
Avoid adding more nitrogen simply because the plant is not producing fruit.
Fertilizer recommendations should be based on the crop, soil, and product instructions rather than a universal recipe.
For a broader plant-care routine that incorporates nutrition with soil, water, light, and maintenance, use the Free AI Plant Care Guide Generator.
Managing Common Tomato Pests

Tomato gardens can attract insects, but seeing one insect does not automatically mean that spraying is necessary.
First identify the pest.
Then decide whether the damage justifies intervention.
Tomato Hornworms
Hornworms are large caterpillars that can consume a surprising amount of foliage.
Because they are large, hand-picking is often practical in a home garden.
Look for missing leaves and dark droppings when searching.
If a hornworm is covered with small white structures resembling grains of rice, leave it alone.
Those are parasitoid wasp cocoons.
The developing wasps are natural enemies of the caterpillar.
Aphids
Aphids are small, soft-bodied insects that often gather on tender new growth.
A small population may cause little damage.
A larger population can cause curling, distortion, and reduced growth.
A strong stream of water can sometimes dislodge them.
Beneficial predators such as lady beetles and lacewings can also help keep aphid populations under control.
Stink Bugs
Stink bugs can feed on developing fruit and may cause surface damage.
Regular inspection is useful, particularly when fruit is beginning to develop.
Slugs and Other Garden Pests
Slugs may chew holes in leaves and fruit close to the soil.
Hand-picking, removing hiding places, and physical barriers can be useful.
Do not automatically reach for pesticide products before identifying the pest.
If treatment is necessary, use a product appropriate for the crop and pest and follow its label.
Do not assume that homemade soap mixtures or neem preparations are automatically safe for every tomato plant, beneficial insect, or edible crop.
For a visual check when you are unsure whether an issue is pest damage or plant disease, use the Free AI Plant Disease Identifier.
Preventing and Recognizing Tomato Diseases

Tomato diseases are easier to manage when you think about prevention and diagnosis together.
Give Plants Good Airflow
Adequate spacing allows foliage to dry more quickly after rain or irrigation.
Avoid creating a dense wall of leaves.
Water the Soil
Routine overhead watering can keep foliage wet and can splash soil onto leaves.
Water near the base of the plant when practical.
Remove Diseased Plant Material
When a disease clearly affects leaves or stems, remove affected material as appropriate.
Heavily diseased plant debris should not automatically be added to a home compost pile because some pathogens can survive in plant material.
Clean Your Tools
Clean pruning tools when moving between plants, particularly when working on visibly diseased plants.
Learn the Difference Between Similar Symptoms
A brown leaf spot could be caused by several different problems.
Early blight can produce dark lesions with concentric rings, often beginning on older foliage.
Late blight can produce irregular, water-soaked lesions that become brown or olive colored and can spread rapidly in favorable conditions.
Bacterial diseases can also cause spots on leaves or fruit.
A photograph of one damaged leaf is not always enough to identify the problem accurately.
University extension diagnostic resources emphasize looking at the complete symptom pattern rather than assuming that every spot represents the same disease.
For another site resource focused specifically on interpreting visible plant symptoms, see the Free AI Plant Disease Identifier.
Blossom-End Rot, Cracking, and Other Fruit Problems
Blossom-End Rot
Blossom-end rot appears as a dark, sunken area at the blossom end of the tomato.
It is often described as a calcium deficiency, but simply adding calcium to the soil does not automatically correct the problem.
The disorder develops when the developing fruit does not receive enough calcium during an important stage of growth.
Fluctuating water availability is a major contributing factor.
University of Minnesota Extension notes that blossom-end rot is associated with changes in soil moisture, while Penn State Extension emphasizes maintaining appropriate growing conditions rather than assuming the soil simply lacks calcium.
What to Do
Keep soil moisture reasonably consistent.
Use mulch.
Avoid severe drying followed by heavy watering.
Do not add lime or crushed eggshells automatically.
Use a soil test before changing soil pH or nutrient levels.
Remove badly affected fruit and concentrate on stable growing conditions for the next set of developing fruit.
Cracking and Splitting
Tomato fruit can crack when water availability changes rapidly, and the fruit expands faster than the skin can stretch.
Heavy rain following a dry period is a common trigger.
Radial cracks extend outward from the stem end.
Concentric cracks form in rings around the stem.
Reducing Cracking
Maintain more consistent soil moisture.
Use mulch.
Avoid letting plants become severely drought-stressed.
Choose varieties with better cracking resistance if the problem is common in your garden.
No method can eliminate cracking completely during unusual weather.
Sunscald
Fruit that becomes suddenly exposed to intense sunlight can develop pale or whitish damaged areas.
Excessive pruning can make this more likely by removing leaves that previously shaded the fruit.
Catfacing
Catfacing produces scarred or distorted fruit.
Cold conditions during early fruit development are one possible contributor.
The fruit may still be usable depending on the severity of the damage.
Leaf Roll
Tomato leaves can curl inward because of heat, drought, root disturbance, or other stress.
Leaf roll does not automatically mean that the plant has a disease.
University of Minnesota Extension lists leaf roll, sunscald, catfacing, yellow shoulders, blossom-end rot, and cracking among tomato disorders that are not all caused by infectious diseases.
For help distinguishing visible symptoms that can look similar, use the Free AI Plant Disease Identifier.
Harvesting and Ripening Tomatoes

The color of a ripe tomato depends on the variety, so do not assume every ripe tomato should be red.
Red, orange, yellow, pink, purple, striped, and even green varieties can all be ripe.
Understand the Ripening Stages
Mature Green
The tomato has reached mature size but has not yet developed visible ripening color.
Breaker Stage
The first visible color begins to develop.
At this stage, the fruit has entered the natural ripening process and can continue ripening after harvest.
Turning and Pink Stages
Color progressively spreads across the fruit.
Fully Ripe
The fruit has reached the characteristic color and texture of its variety.
Penn State Extension notes that breaker-stage tomatoes can continue ripening after harvest, which can be useful near the end of the growing season.
How to Harvest Without Damaging the Plant
Hold the fruit gently.
Depending on the variety, harvest by twisting the fruit away from the plant or use clean pruning shears when a clean cut is easier.
Do not yank fruit forcefully from a branch.
Harvesting does not have to happen at a specific hour.
The important things are maturity, fruit quality, and gentle handling.
What About Cracked Tomatoes?
A cracked tomato is not automatically unsafe.
Inspect the damaged area.
Use the fruit promptly when the crack is small, and the tomato otherwise appears sound.
Discard fruit that is moldy, severely rotten, leaking, or otherwise spoiled.
For another example of managing harvest timing in a home fruit crop, see the Papaya Plants for a Continuous, Tasty Crop.
Storing and Preserving Your Tomato Harvest

Fresh tomatoes are generally best kept at room temperature while they are finishing ripening.
Keep them out of direct sunlight and avoid crushing ripe fruit beneath heavier tomatoes.
Very ripe tomatoes can be refrigerated when necessary, although refrigeration can affect texture and flavor.
Ripening Green Tomatoes Indoors
Mature green tomatoes can continue ripening indoors.
Sort fruit according to maturity.
Tomatoes that have already entered the natural ripening process have a better chance of finishing indoors than very small, immature green fruit.
Keep sound fruit at room temperature and inspect it regularly.
Remove fruit that begins to rot.
Freezing Tomatoes
Freezing is one of the simplest preservation methods for a large harvest.
Texture changes after freezing, so frozen tomatoes are generally better suited to:
sauces
soups
stews
cooked dishes
and other preparations where fresh texture is not essential
Follow appropriate food-preservation guidance for freezing methods.
Drying Tomatoes
Tomatoes can be dried using a suitable dehydrator or another tested method.
Drying concentrates flavor while reducing moisture.
Make sure the finished product is properly dried and stored according to the preservation method being used.
Canning Tomatoes Safely
This is one area where improvisation should be avoided.
Tomatoes are acidic, but their acidity can vary.
The National Center for Home Food Preservation states that tomatoes intended for home canning should be acidified according to tested instructions. Its current guidance specifies 1 tablespoon of bottled lemon juice or ¼ teaspoon citric acid per pint, or 2 tablespoons bottled lemon juice or ½ teaspoon citric acid per quart, when canning whole, crushed, or juiced tomatoes.
Follow the tested recipe exactly.
Do not reduce the required acidity because you prefer a less tart flavor.
Do not invent a shelf-stable recipe by changing the proportions of tomatoes, onions, peppers, oil, herbs, or other ingredients.
Use only sound, disease-free tomatoes for canning. The National Center for Home Food Preservation specifically recommends firm, preferably vine-ripened, disease-free tomatoes and warns against canning tomatoes from frost-killed vines.
Tomatoes Stored in Oil
Do not use homemade tomatoes packed in oil as a room-temperature preservation method unless you are following a specifically tested preservation procedure.
The earlier draft’s suggestion that oven-roasted tomatoes could simply be kept in olive oil for months was unsafe advice and has been removed from this final version.
For long-term storage, use freezing, drying, or a tested canning method.
For another article about practical ways to reduce food waste, see How to Use Overripe Bananas: 7 Simple Waste-Free Recipes.
Saving Tomato Seeds
Saving tomato seeds can be rewarding, particularly when you grow open-pollinated varieties.
Open-Pollinated Tomatoes
Seeds saved from an open-pollinated variety are generally more likely to reproduce the parent type when cross-pollination has been controlled appropriately.
Hybrid Tomatoes
Seeds can be saved from hybrid tomatoes, but the next generation may show different combinations of traits and will not necessarily reproduce the original hybrid.
Choosing Fruit for Seed Saving
Save seeds from healthy, fully mature fruit that represents the characteristics you want to preserve.
Label the variety and year.
Keep seeds thoroughly dry before storage.
Store them in a cool, dry place in a clearly labeled container.
Saving seed becomes much more useful when you keep a small record of:
variety
planting date
first harvest date
fruit characteristics
disease problems
and general performance
That information helps you decide what to grow again next season.
For another example of growing a crop over multiple seasons and choosing plants suited to local conditions, see the Pomegranate Plants: Low Maintenance, High Reward guide.
Growing Tomatoes in Containers
Tomatoes can grow successfully in containers when the plant, container, growing medium, and support system are matched properly.
Choose the Right Variety
Compact, determinate, dwarf, or patio varieties are often easier to manage in containers.
Larger indeterminate varieties can be grown in sufficiently large containers when strong support is available, but they demand more attention.
Choose a Large Enough Container
Do not choose the smallest pot simply because the young plant looks small.
Think about the mature plant and its root system.
A larger container generally provides more room for roots and more growing medium to buffer changes in moisture.
Make Sure Drainage Is Adequate
Every container should have drainage openings.
Excess water must be able to escape.
A container without drainage can remain saturated and create unhealthy root conditions.
Use Appropriate Growing Medium
Avoid filling containers entirely with heavy garden soil.
A suitable container mix should balance drainage, moisture retention, and root aeration.
Monitor Water More Closely
Container tomatoes can dry out faster than plants growing in the ground, particularly during hot or windy weather.
Check the actual moisture of the growing medium rather than watering automatically.
Provide Support Early
Even a container-grown tomato can become heavy with fruit.
Install the cage, stake, or trellis while the plant is still small.
Our Growing Fig Trees in Container: Easy Fruit for Small Spaces article provides another practical example of matching container size and growing conditions to the mature plant.
Seasonal Tomato Care
There is no single tomato calendar that works everywhere.
A gardener in a cool climate may plant much later than someone in a warm region.
Instead of memorizing fixed dates, organize care around the plant’s growth stage and local weather.
Before Planting
Choose a suitable variety.
Prepare the soil.
Check drainage.
Arrange support.
Start seeds indoors if necessary.
Watch local weather conditions.
Early Growth
Check soil moisture regularly.
Watch for transplant stress.
Secure growing stems.
Inspect leaves for insects.
Remove weeds around the planting area.
Flowering and Fruit Development
Maintain reasonably consistent moisture.
Continue supporting the plant.
Watch developing fruit for cracking and blossom-end rot.
Avoid unnecessary nitrogen fertilizer.
Inspect flowers and foliage regularly.
Peak Harvest
Pick ripe fruit regularly.
Use damaged fruit promptly.
Preserve excess tomatoes before they deteriorate.
Continue checking for disease.
End of Season
Monitor the weather.
Harvest suitable mature green or partially colored fruit before destructive cold.
Remove seriously diseased plant material.
Clean up the growing area.
Record which varieties performed well.
For location-based planting and seasonal planning, use the AI Plant Growing Calendar by Location.
Common Tomato-Growing Mistakes
Mistake 1: Planting Too Early
Cold soil and cold nights can delay growth and damage young plants.
Mistake 2: Choosing a Variety Without Considering Mature Size
A vigorous indeterminate plant can overwhelm a small garden or weak container.
Mistake 3: Planting Too Closely
Crowded plants are harder to inspect and can have poorer airflow.
Mistake 4: Watering by the Calendar
Different soils, containers, weather conditions, and plant sizes have different water needs.
Mistake 5: Keeping Soil Constantly Saturated
Roots need access to oxygen as well as water.
Mistake 6: Adding Fertilizer Whenever a Plant Looks Unhealthy
Yellowing, poor growth, curling, and spotting can have many causes.
Mistake 7: Removing Too Many Leaves
Tomato foliage plays an important role in plant growth.
Mistake 8: Spraying Every Insect You See
Identify the insect first.
Mistake 9: Calling Every Brown Spot Early Blight
Several diseases and non-disease disorders can look similar.
Mistake 10: Adding Calcium Without Understanding Blossom-End Rot
The problem is not simply “no calcium in the soil.”
Mistake 11: Improvising Food-Preservation Recipes
Shelf-stable canning requires tested recipes and proper processing.
Mistake 12: Treating AI Advice as a Guaranteed Diagnosis
AI tools can help organize information and identify possible causes, but a visual analysis is not the same as laboratory testing or professional horticultural diagnosis.
For help checking unusual symptoms before taking action, use the Free AI Plant Disease Identifier.
Frequently Asked Questions
Final Thoughts
Growing tomatoes successfully is less about finding a perfect formula and more about learning to read your garden.
Choose a variety that fits your space.
Give it suitable soil and sunlight.
Plant when the weather is warm enough.
Provide support before the plant becomes difficult to manage.
Water according to conditions rather than a rigid calendar.
Use fertilizer thoughtfully.
Watch for pests and disease.
Harvest fruit when it reaches the stage you prefer.
And when your plants produce more tomatoes than you can eat fresh, preserve them using safe, tested methods.
Some seasons will produce baskets of beautiful tomatoes.
Other seasons may bring cracking, pests, disease, heat, or a variety that simply does not perform well in your location.
That is normal.
Keep notes.
Learn which varieties suit your conditions.
Adjust one thing at a time.
The next season will be easier because you will already know more about your own garden.
And perhaps the best part of growing tomatoes is also the simplest: you can walk outside, pick a ripe tomato, and bring it straight to the kitchen.
For more home-garden guides and practical growing resources, explore the Free AI Gardening Tools hub.

